


Top Universities in USA for Indian Students

Intending to give a new dimension to your academic endeavors by flying to the USA? However, are you also stuck at the VISA application phase? Is your brain misted up by the endless information required by the DS-160?
Cheer up! Let this blog take the wheel and maneuver you on filling up the DS-160!
Before you learn to tackle the humdrum task of filling the DS-160, firstly dart a look at the Frequently Asked Questions!
Frequently Asked Questions
You can fill out the DS-160 form at the official website of the Consular Electronic Application Center.
Nevertheless, translations of all the questions are available in numerous languages from the drop-down menu that will be present in the upper right corner
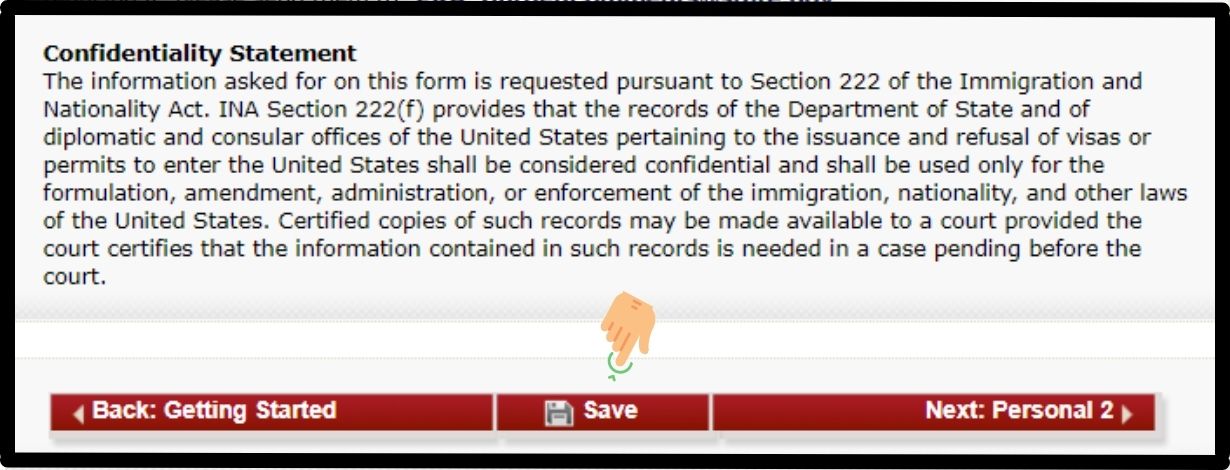
Don't forget to save your application ID. You will have 30 days to revisit the partially completed application.
1. You can use the table visible on the left side of your screen to select the desired section, or
2. You can click on the Back arrow visible at the bottom of your application form.
Heading for the VISA Interview, but fogged up with the questions? Let YMGrad take off your burden! Signup for the one-on-one VISA Mock Interview session today!
I hope you would have got the answer to most of your queries. Now it's crunch time, so shall we begin understanding the crux of the different sections of DS-160?
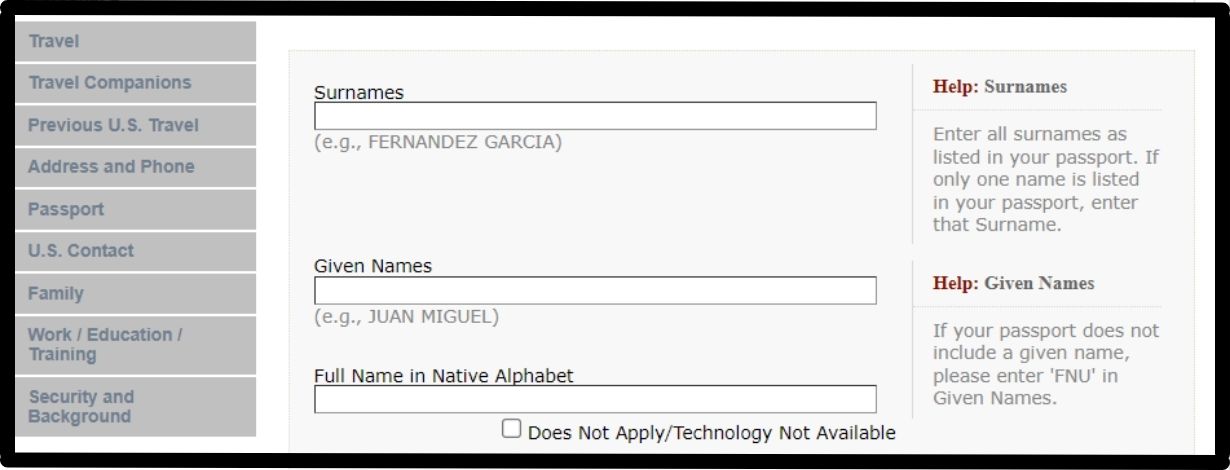
1. Personal Information
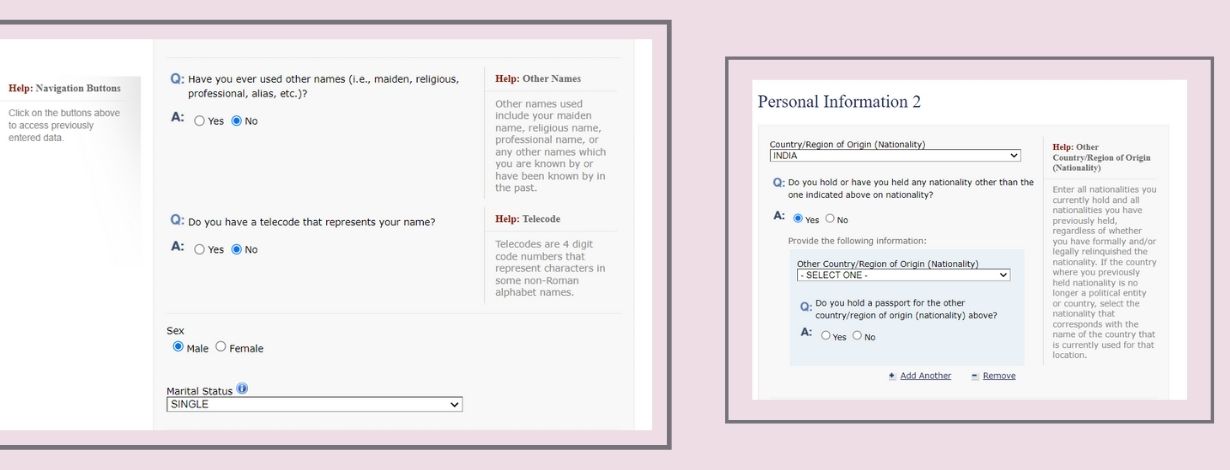
When you log in to your DS-160, you will find two Personal Information sections. The first section basically demands identifying information, including Name and Surname, while the second deals with the data related to your nationality.
Remember, in the Surname and Given Names section, you should enter the details as mentioned in your passport.
If the day or month of birth is unknown, it is suggested to copy the exact information from your passport.
Moving on to the Personal Information 2 section, it will demand details of Other Nationality. If you do not hold any other nationality, then you just need to select NO. However, if you select 'YES,' a couple of supplementary questions will appear on your screen.
2. Travel Information
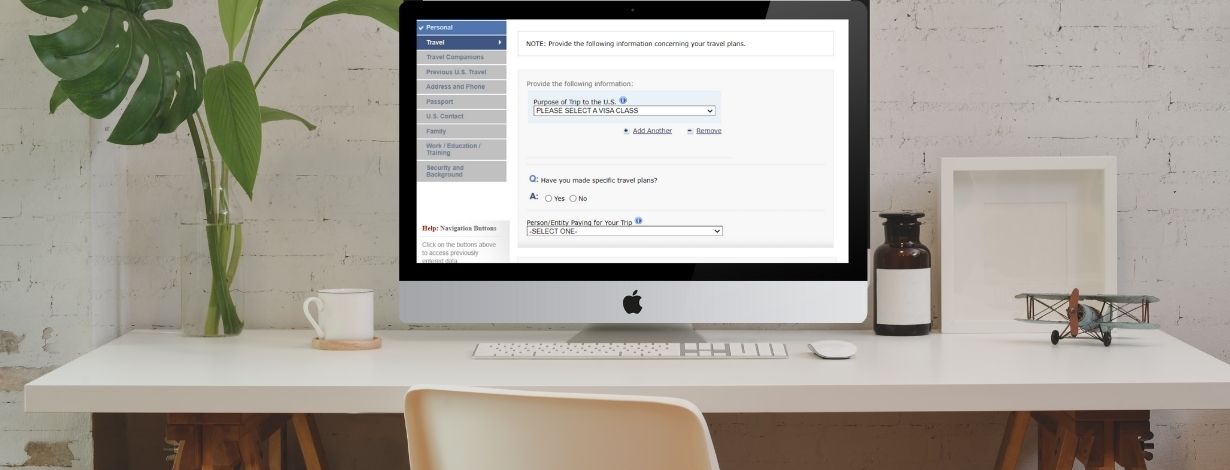
The first section that will appear in the Travel Information sections is Purpose of Travel. There are numerous categories available in the drop-down menu. However, there might be some categories that will demand a couple of extra pieces of information.
Some of the standard visa application classes in the pull-down menu are:
Academic or Language Student (F)
Business Pleasure Visitors (B)
Temporary Visitor (H)
Exchange Visitor Visa (J, M, Q)
If you select "Temporary Worker," you will be asked to specify the type that may include: Trainee - H3, Speciality Occupation - H1B, and Spouse of an H - H4.
The following section that will demand additional information will be Travel Companions Information, where you would have to enter the details of the person(s) traveling with you, if any.
Upon entering all the details in the previous section, the Previous U.S. Travel Information page will appear on the screen. You will see around 4 basic questions on this page asking about your travel history to the US. It will demand detailed information if you have had any previous VISA denial.
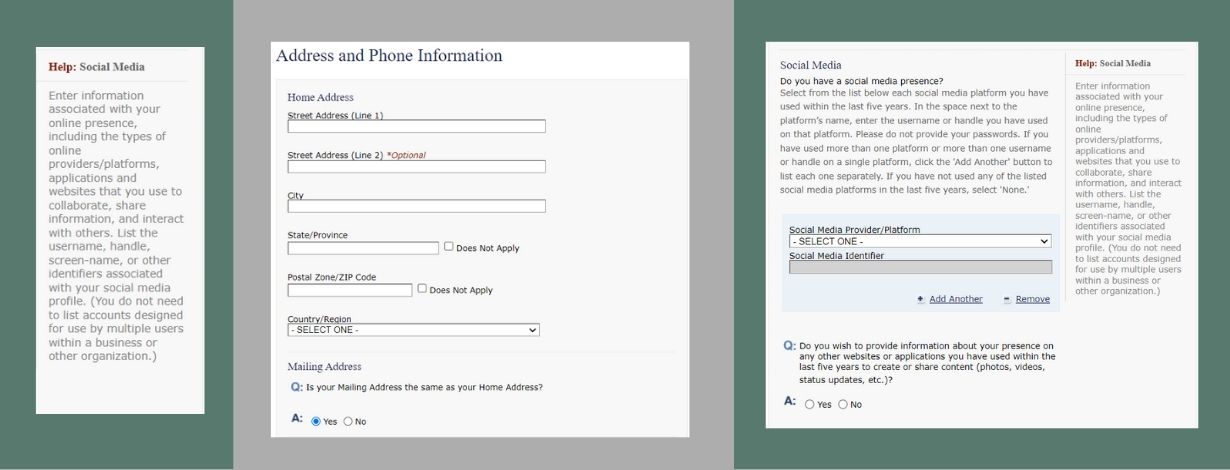
4. Address and Phone Information
This section will demand your Address Information and Contact Details.
Initially, you would be required to enter your Home Address and Mailing Address. In case your mailing address is different from the home address, then you would have to provide details of the same in the subsequent part.
Further, you have to mention your Phone Number and Email Address along with the information of the Social Media Platforms that you use.
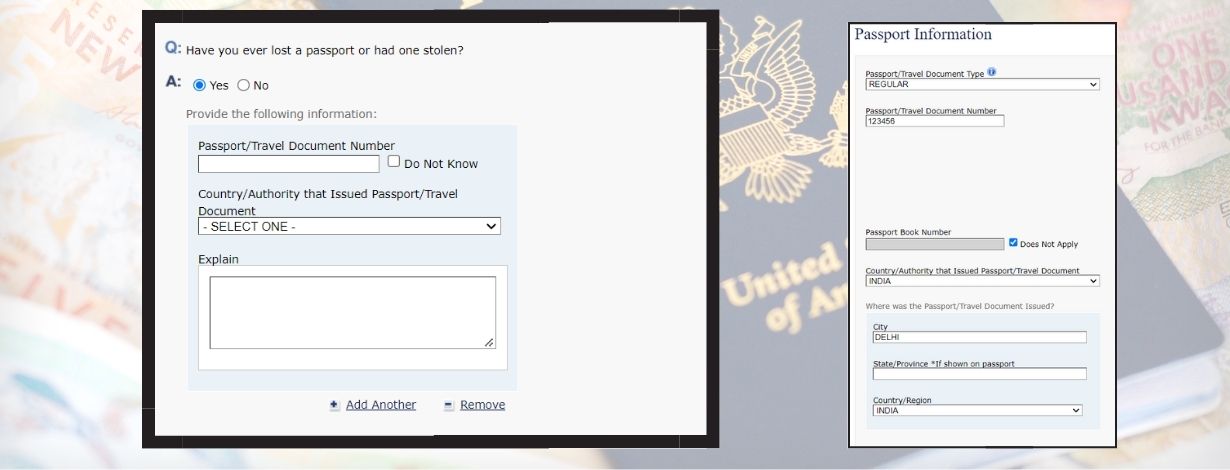
5. Passport Information
In the Passport Information segment, you need to enter the following details:
- Passport Type
- Passport Number
- Passport Book Number
- Issuance Date
- Expiration Date
- Information about Lost/Stolen Passport
If you have ever lost your passport or it was stolen, then you would have to select YES in that section. Eventually, you will be asked to specify some information related to the same, along with an explanation.
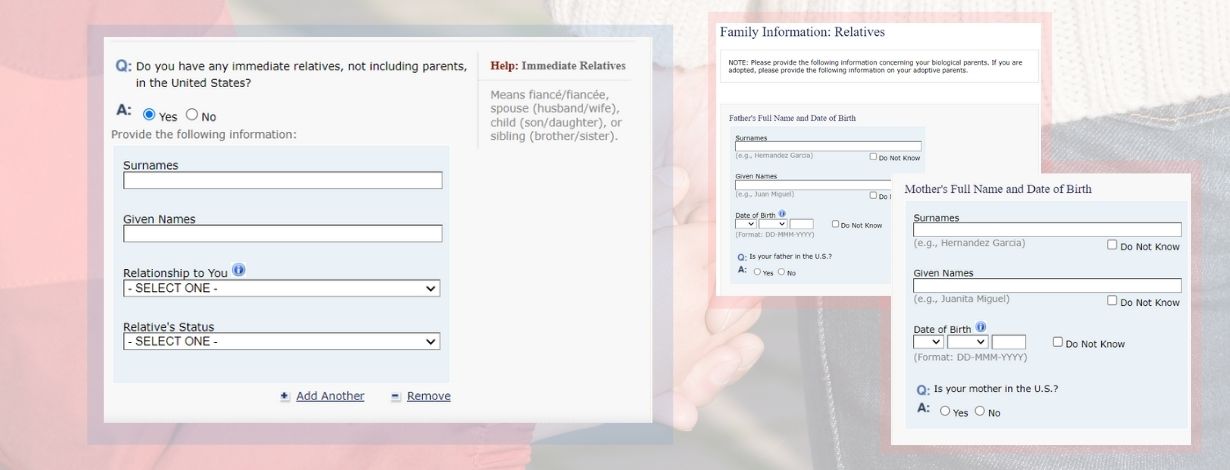
6. Family Information
Under Family Information: Relatives, you have to share the details of your parents, including their Surname, Given name, and D.O.B.
Apart from this, you will be asked about your immediate relatives in the U.S. The following relationships are categorized under immediate relatives:
- Fiancé/Fiancée
- Spouse
- Children
- Siblings
If you select YES in 'Do you have any immediate relatives, not including your parents, in the United States?', then you will have to provide their information.
7. Present Work/Education/Training Information
Ohkay! I know filling up DS-160 isn't easy. It might seem that you just need to enter basic details, but just after two or three sections, you will be cheesed off!
We have so far completed 3/4th of the form, and yet a quarter more to go. So, let's take a gander at this section.
Here, you will have to present information about your Primary Occupation, and based upon that; you will get further questions. You can select from Retired to Business, Communications to Computer Science, and Homemaker to Student.
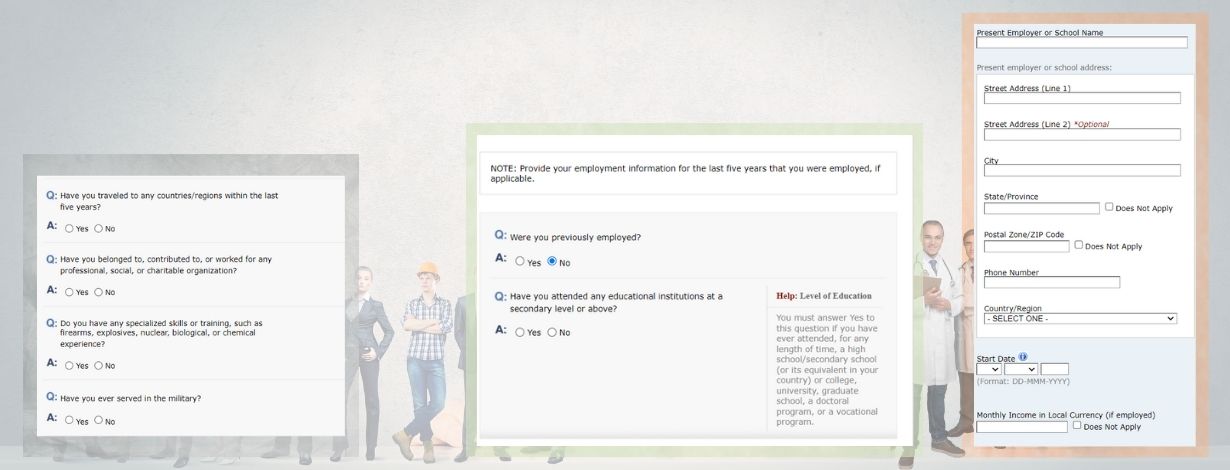
Further, you will have to answer 'Have You Traveled to Any Countries Within the Last Five Years?' in this section. If you have traveled, you would be required to select YES, and add the details about the particular country.
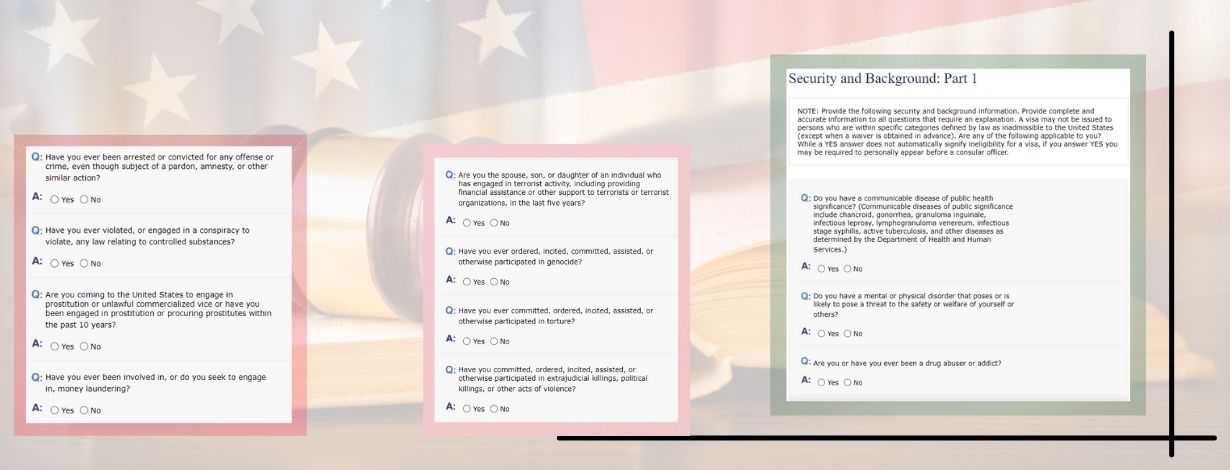
8. Security and Background
In this section, you must read all the questions carefully and select the answer accordingly. It is recommended to reveal the correct information to avoid charges for keeping the information hidden.
9. Additional Point of Contact Information
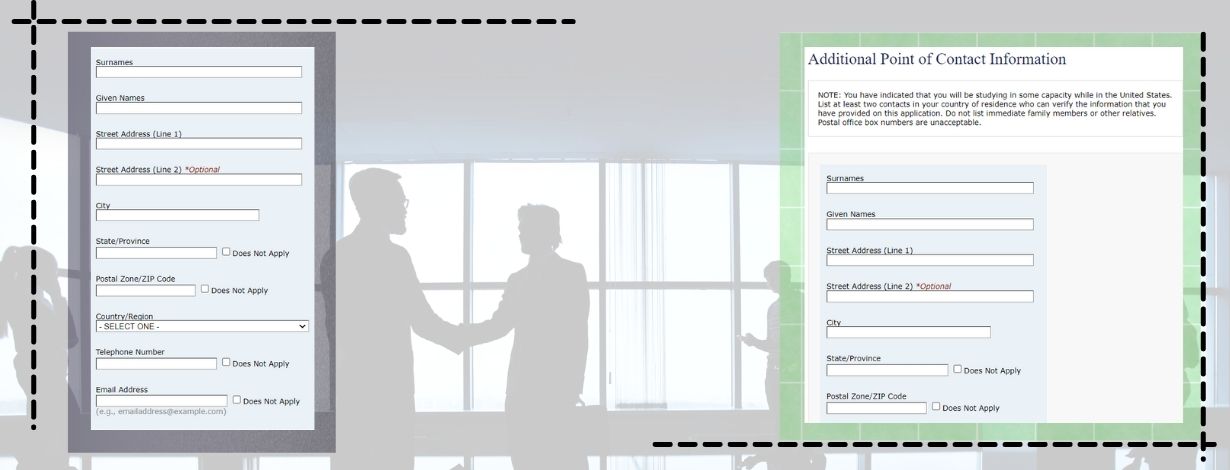
Here, you need to fill in the information of some apart from your immediate family or other relatives. Their information is required to verify your identity if needed.
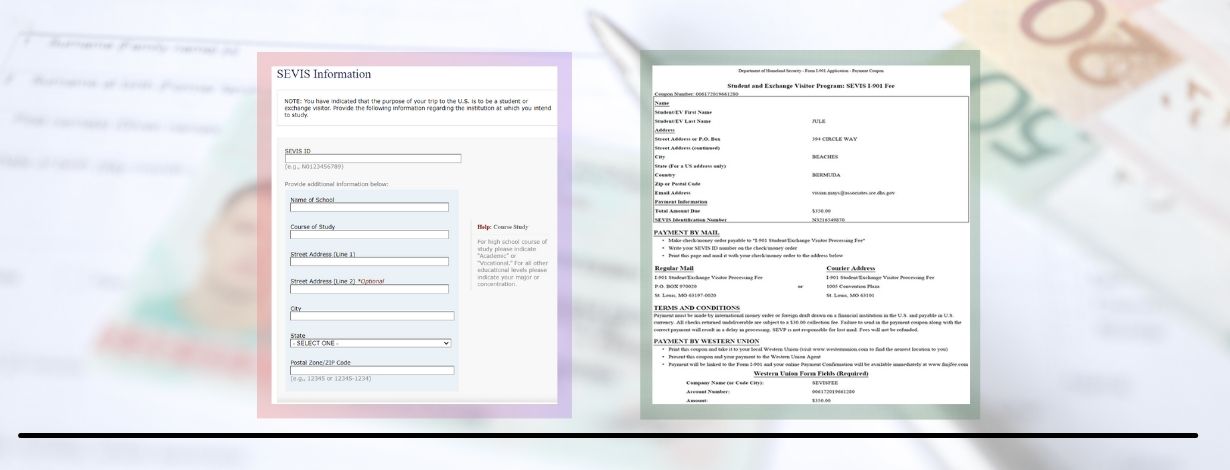
10. SEVIS Information
The Student Exchange Visitor Information System is available at the top left side of your I-20 form. You would be required to fill in this alphanumeric number in the SEVIS ID section.
Whew! Finally, we completed the daunting task.
Calling off!
Once you've submitted the DS-160, the next step is to sign up for an appointment at your nearest consulate at your earliest convenience. However, this can be grasping at straws. The appointments are usually packed up, which might impact the admission process. Lighten up! Team YMGrad got your back. From DS-160 completion to Appointment Booking, YMGrad ensures the best VISA Application Help to the clients!
Is it an uphill climb to fill out DS-160? Struggling to schedule a VISA appointment? Check out YMGrad's VISA Application Help service!
To watch the video on How to fill DS-160, click here